DIY Soap Making: Create Natural Recipes for Healthier Skin at Home

Soap making at home is a fun and creative activity. It allows you to control the ingredients and make natural products. DIY soap making is gaining popularity for its simplicity and benefits. You can create soaps that are gentle on the skin and free from harsh chemicals. This guide will help you explore natural recipes for your bathroom.
Making soap at home has many benefits. You can choose natural ingredients that suit your skin type. Homemade soaps are often more moisturising than store-bought ones. They do not contain synthetic additives or preservatives. This makes them a healthier choice for your skin and the environment.
AI-generated summary, reviewed by editors

The basic ingredients for soap making include oils, lye, and water. Oils like olive, coconut, and palm are common choices. Each oil has unique properties that affect the soap's texture and lather. Lye is essential for the saponification process, which turns oils into soap. Always handle lye with care, as it is a caustic substance.
Natural Additives
Adding natural ingredients can enhance your soap's qualities. Essential oils provide fragrance and therapeutic benefits. Lavender oil is calming, while tea tree oil has antibacterial properties. Herbs like chamomile or mint can add texture and colour. Oatmeal is another popular additive for its exfoliating properties.
Basic Soap Recipe
A simple recipe includes olive oil, coconut oil, lye, and water. First, measure your ingredients carefully. Mix the lye with water in a well-ventilated area. Allow it to cool while you melt the oils together. Once both mixtures are at a similar temperature, combine them slowly. Stir until you reach a trace, then pour into moulds.
Safety Precautions
Safety is crucial when making soap at home. Always wear gloves and goggles when handling lye. Work in a well-ventilated space to avoid inhaling fumes. Keep vinegar nearby to neutralise any spills of lye solution. Follow instructions carefully to ensure a safe and successful soap-making experience.
Curing Process
After pouring the soap into moulds, it needs time to cure. Curing allows excess water to evaporate, hardening the soap. This process takes about four to six weeks. Place the soaps in a cool, dry area with good air circulation. Turn them occasionally to ensure even curing.
Customising Your Soap
You can personalise your soap by experimenting with different ingredients and designs. Try adding natural colourants like turmeric or cocoa powder for variety. Use silicone moulds in various shapes for fun designs. Layering different colours or embedding small objects can create unique effects.
Environmental Impact
DIY soap making reduces plastic waste from packaging of commercial soaps. By choosing sustainable ingredients, you contribute to environmental conservation. Homemade soaps are biodegradable and less harmful to aquatic life compared to synthetic detergents.
DIY soap making offers a rewarding way to create personalised skincare products. With natural recipes, you can enjoy healthier skin while being kind to the planet. Start experimenting today and discover the joys of crafting your own soaps at home.
-
 Gold Silver Rate Today, 30 March 2026: City-Wise Prices, MCX Update On 24K Gold, 22K Gold And Silver
 -
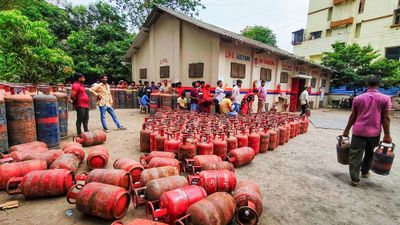 LPG Crunch: Karnataka Brings New SOPs, Makes PNG Registration Mandatory for Businesses
 -
 Hyderabad Gold Silver Rate Today, 30 March 2026: Check Fresh 24K, 22K, 18K Gold And Silver Prices In City
 -
 Opinion Poll For Kerala Assembly Election 2026: Ldf Strength In Kannur And Kasaragod
 -
 Tamil Nadu Polls 2026: Vijay Reveals Rs 645 Crore Assets, Rs 266 Crore in Banks; Know All His Declaration
 -
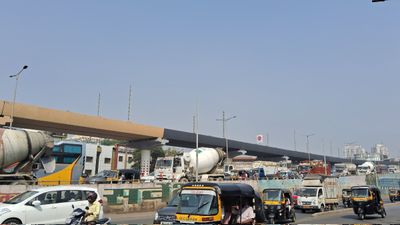 Mumbai Metro Line 9 Set for April 3 Launch, Dahisar-Mira Bhayandar to Get Direct Boost
 -
 Hyderabad Gold Silver Rate Today, 31 March 2026: Gold And Silver See Fresh Movement, Check Latest City Rates
 -
 Gold Silver Rate Today, 31 March 2026: City-Wise Prices, MCX Trend As Gold Rises And Silver Slips
 -
 Rahul Arunoday Banerjee Autopsy Report: Actor Was Underwater For Over An Hour, Sand Found In Lungs
 -
 Thunderstorm Warning In Delhi NCR: IMD Issues Orange Alert Amid Sudden Weather Shift
 -
 Trump Hints At Breakthrough With Iran Amid War Escalation, Calls Recent Move A ‘Sign Of Respect’
 -
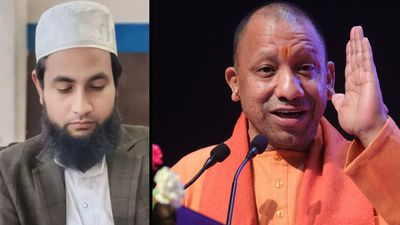 UP STF Nabs Maulana Abdullah Salim Over Controversial Comment On CM Yogi's Mother


 Click it and Unblock the Notifications